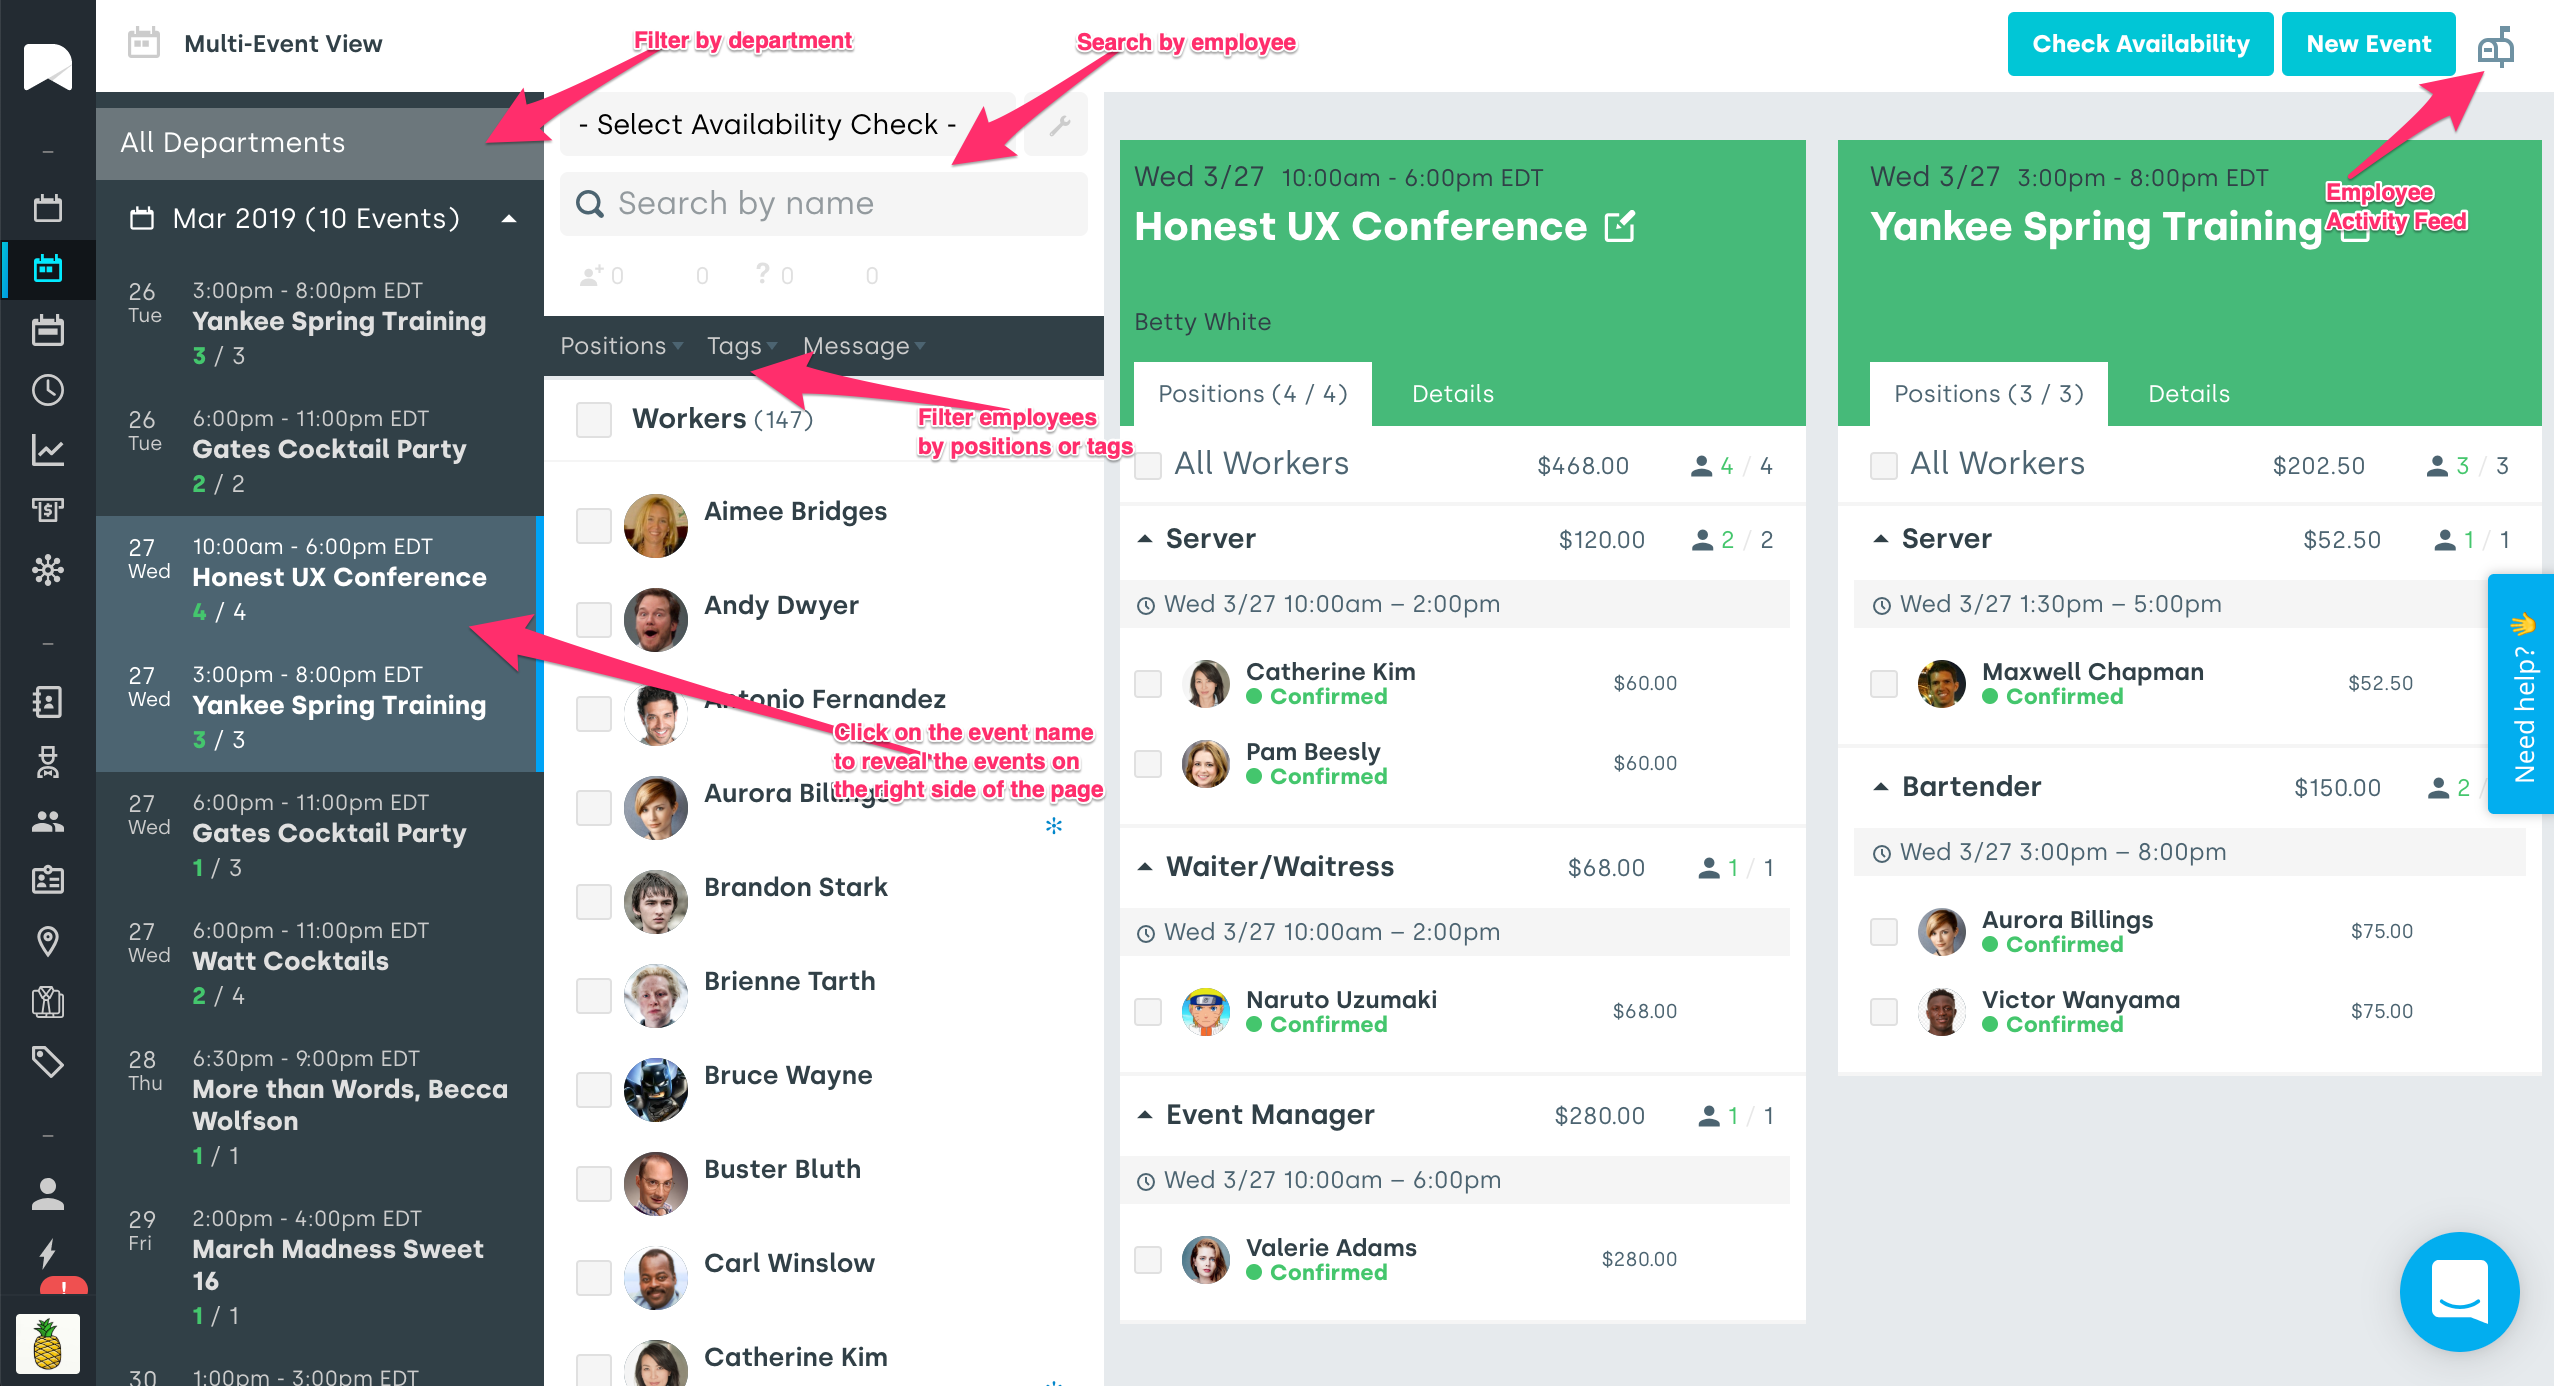
The Multi-Event View is designed to display your event rosters for multiple events all in one place. At a quick glance, you can quickly evaluate if you have the best mix of talent and experience across your events on a busy day.
Getting to know the Multi-Event View

In the image above, there are two fully confirmed events listed side by side, each representing an "Event Card".
Event Cards list the name and time of the event at the top, as well as the number of filled/unfilled shifts, and venue details. You can update event and shift details by selecting the icons in the upper right corner.

How to Schedule Workers
The Multi-Event View also allows you to schedule events by dragging and dropping worker names from the worker list on the left into the event shift.
If you need to move workers from one event to another, simply click on a name and drag it into another event.
Scheduling An Individual
You can send a message to an individual by selecting the three dots, which will reveal a pop-up. Select Request Confirmation to ask the worker if they would like to work the event or select Manually Confirm to override the question and confirm the worker for the event.

Scheduling Multiple Workers
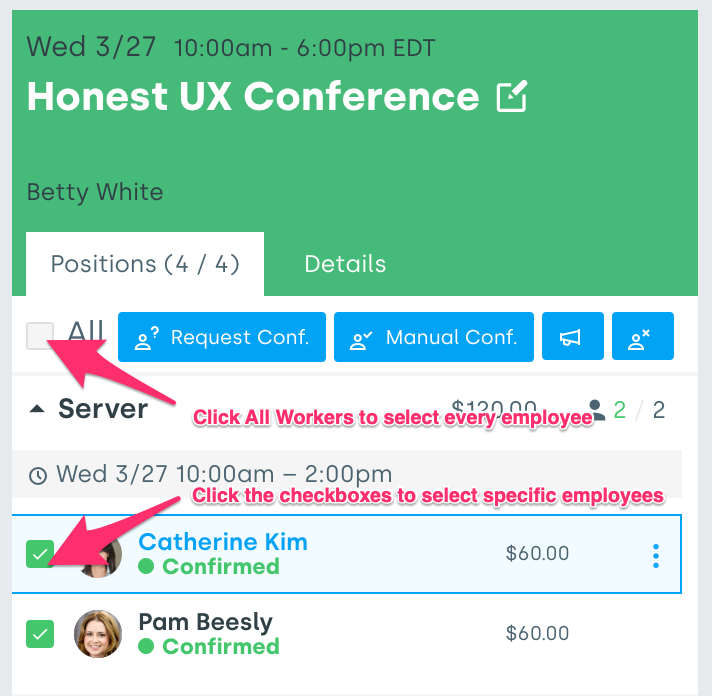
You can send a message to All Workers or a specific group of workers by selecting the checkboxes next to their names. Once the checkboxes have been clicked, Request Confirmation, Manually Confirm, and Announcement will appear at the top of the Event Card. Click any button to perform your desired action.

Was this article helpful?
That’s Great!
Thank you for your feedback
Sorry! We couldn't be helpful
Thank you for your feedback
Feedback sent
We appreciate your effort and will try to fix the article